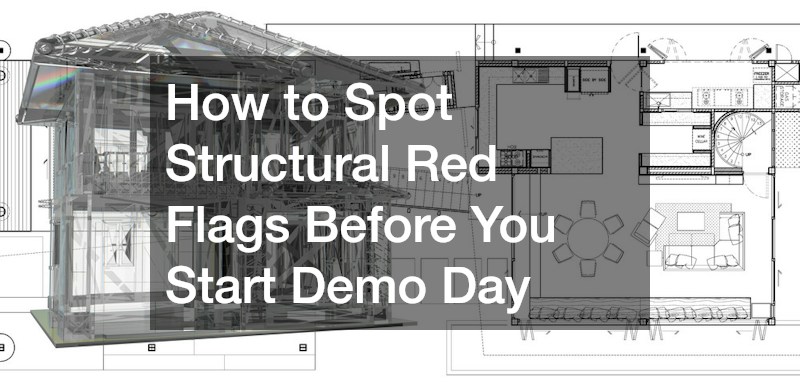
The satisfying crash of a sledgehammer breaking through a drywall partition is a staple of home improvement shows, but real-life demolition day rarely matches the scripted simplicity of television. Swinging a hammer without conducting a rigorous pre-demolition inspection is one of the fastest ways to turn a rewarding project into an expensive structural nightmare. Behind painted plaster and decorative trim lies the home’s primary structural skeleton, a complex network of load-bearing studs, floor joists, rim boards, electrical runs and plumbing lines. Missing a warning sign before opening up a wall can result in sagging ceilings, cracked foundation footings, severed utilities or outright structural failure.
A comprehensive pre-demolition audit protects your budget, your project timeline and your personal safety. Spotting structural red flags early allows you to consult licensed professionals, acquire necessary permits and adjust your scope of work before damage occurs. Whether you plan to open up a closed kitchen layout, convert a basement space or gut a historic bathroom, inspecting your home’s framing and mechanical systems from the attic down to the foundation is an essential first step. This guide walks through every major system in your home, providing practical techniques to uncover hidden structural defects before swinging your first tool.
1. Exterior Foundations and Load-Bearing Walls: Reading the Framing Before Sledgehammers Swing

Evaluating a home’s structural framing begins with identifying how weight travels through the building down to the soil. Every house relies on a continuous load path where weight from the roof, upper floors and furniture transfers down through vertical studs, continuous posts and foundation footings. Interrupting this path without installing temporary shoring walls or engineered header beams can cause immediate ceiling sagging or wall displacement.
Before taking down any interior wall, you must determine whether it is load-bearing or a simple non-structural partition wall. Walls that run perpendicular to floor and ceiling joists almost always carry weight from above. Walls positioned directly over foundation stem walls, central support beams or lower-floor load walls are also primary structural elements. Exterior walls are universally load-bearing and must never be altered without engineered headers.
Structural foundation issues often reveal themselves through subtle wall and ceiling shifts inside the home:
-
Diagonal Step Cracks: Hairline cracks in drywall joint compound are common due to normal seasonal expansion. However, wide diagonal cracks originating from door and window frames—or step-shaped cracking along interior brick or block walls—indicate active foundation settling.
-
Binding Doors and Windows: When door frames shift out of square, door leaves stick against the top or side casing. If multiple doors along a single wall line begin binding simultaneously, the underlying floor structure or foundation is dropping.
-
Exterior Masonry Displacements: Inspect the outside brick veneer or poured concrete foundation for vertical or horizontal shearing. Horizontal cracks along basement walls signal severe hydrostatic pressure pushing inward against the home.
To test wall load paths yourself, head into the attic or basement with a high-powered flashlight. Trace the joists above the target wall. If joists overlap or butt together over the top plate of the wall, that wall is supporting the floor or ceiling above. When removing any load-bearing section, hire a licensed remodeling contractor to size a steel or laminated veneer lumber (LVL) beam. If your roof framing shows signs of dipping or spreading, consult a reputable roofing contractor before touching interior support structures.
2. Floor Inaccuracies and Subfloor Decay: Identifying Hidden Structural Sag Underneath Footing
Unstable or sloping floors are clear indicators of compromised joists, inadequate post support or hidden subfloor rot. Walking across a room should feel rigid and firm; excessive bouncing, creaking or visible dipping indicates that the floor framing below is over-spanned, undersized or damaged. Strip away surface coverings in small, non-critical areas to inspect the subfloor quality before demo day begins.
Over decades of use, floor structures settle due to heavy furniture loads, environmental moisture or improper trade alterations. Inspecting joists from a crawl space or basement provides a clear view of floor health. Look for sistered joists—where previous owners nailed additional boards alongside old ones to temporarily fix sags—and check for unauthorized notches where mechanical lines were installed.
To evaluate floor levelness and subfloor stability, perform these practical checks:
-
Laser Leveling: Set up a self-leveling cross-line laser in the center of the room. Measure the distance from the laser line down to the subfloor at two-foot intervals across the space. A variation greater than a quarter-inch over ten feet warrants structural investigation.
-
Deflection Testing: Stand in the center of the room and bounce lightly on your heels while observing standing furniture or ceiling light fixtures. Excessive vibration points to over-spanned floor joists or removed mid-span bridging.
-
Subfloor Rot Inspection: Check areas adjacent to exterior doors, sliding glass panels and plumbing fixtures for subfloor softness. Use an awl or screwdriver to press into the subfloor panels; soft, spongy wood indicates active fungal rot that must be replaced.
Restoring sagging or bouncing floors requires structural sistering, installing mid-span support beams or laying new structural subfloor panels. If you plan to lay heavy new finishes like solid hardwood flooring over an uneven subfloor, fixing structural deflection beforehand is essential to prevent plank separation or squeaking. When demo extends out toward exterior patio doors or ground-level transitions, work with an experienced hardscaping contractor to ensure exterior grade levels do not channel rainwater back under your subfloors.
3. Wet Zones and Plumbing Infrastructure: Spotting Hidden Rot and Joist Notching
Bathrooms and kitchens represent the highest risk zones for hidden structural damage. Chronic, minor plumbing leaks inside wall cavities can fester silently for years, rotting timber studs, bottom plates and floor joists while leaving surface tiles seemingly intact. Demolition in wet zones frequently exposes structural framing that has been completely hollowed out by wood-decay fungi or severely weakened by previous trades.
A common structural hazard in older homes is improper pipe notching. Previous installers often cut deep notches into the top or bottom of structural floor joists—or bored oversized holes through wall studs—to route copper supply lines and PVC drain stacks. Building codes stipulate that notches in floor joists must not exceed one-sixth of the joist depth and cannot be located in the middle third of the span. When plumbers cut through more than allowed, the load capacity of that joist drops exponentially.
Key indicators of plumbing-related structural rot include:
-
Spongy Tile Beds and Loose Grout: Cracked floor tiles or loose grout lines around toilets, bathtubs and shower enclosures signal subfloor flexing caused by water-damaged plywood underneath.
-
Water-Stained Ceilings Below: Check the plaster or drywall on the ceiling directly beneath second-story wet areas. Dark rings, bubbling paint or sagging drywall indicate long-term water exposure that has likely impacted the floor joists above.
-
Corroded Supply Lines and Drain Stacks: Inspect exposed piping in basements or access panels. Galvanized steel pipe that exhibits heavy exterior rust or copper lines showing green verdigris corrosion are prone to immediate failure during demo vibrations.
-
Sewer Gas Odors: Persistent sewer gas smells can indicate dry traps, cracked cast-iron vent stacks or improper venting, pointing toward compromised wall cavities.
Before tearing out fixtures, map out your home’s main water supply lines and drain stacks. Shut off the main water valve and drain the system before cutting into any wall cavity. If you uncover notched floor joists or corroded supply lines behind wet-zone walls, bring in licensed plumbers to re-route waste lines through approved framing penetrations. If the project involves structural modifications to support heavy stone tubs or tiled shower bases, partner with an established bathroom remodeling company to ensure the underlying framing complies with wet-load codes.
4. Behind the Drywall: Uncovering Electrical Hazards and Load Deficiencies
Breaking into wall cavities without understanding your electrical infrastructure introduces severe risks of accidental electrocution, short circuits and house fires. Electrical wiring is often hidden behind lath, plaster or insulation, running horizontally through wall studs precisely where demo saw blades penetrate. Pre-demolition planning requires locating your electrical distribution panel, identifying live circuits and checking for obsolete wiring types.
Older homes present unique electrical structural challenges. In homes constructed before the 1950s, knob-and-tube wiring—single insulated conductors run through porcelain tubes—may still be active inside wall voids. Knob-and-tube wiring lacks a grounding conductor and relies on open air dissipation to handle heat. Enclosing knob-and-tube wiring in modern wall insulation creates a severe fire hazard. Similarly, aluminum wiring installed in the 1960s and 1970s is prone to oxidation and loose connections at outlet terminals, presenting invisible ignition risks.
Conduct these vital electrical safety checks before wall removal:
-
Non-Contact Voltage Testing: Use a reliable non-contact voltage tester along all walls slated for demolition. Check around switch plates, outlets and baseboards where hidden wiring runs may sit close to the surface.
-
Uncovering Open Junction Boxes: Inspect attics, crawl spaces and basements for open-air wire splices that lack protective junction boxes. All wire connections must be enclosed inside accessible, grounded metal or plastic boxes.
-
Stud Integrity Near Electrical Runs: Look for wall studs that have been completely severed or excessively notched to accommodate electrical conduit or subpanels.
Before swinging hammers, turn off the main circuit breakers servicing the demo zone and lock out the panel. Verify that power is dead across every outlet and fixture using a digital multimeter. When opening up walls during a major kitchen layout overhaul, hire a qualified electrician to safe-off existing circuits, install temporary construction power and run new dedicated lines for high-draw appliances. If your remodel involves knocking down partition walls to expand cooking spaces, coordinate with professional kitchen remodeling services to design functional conduit pathways through new structural framing.
5. Property Boundary and Perimeter Structures: Evaluating Exterior Load and Grade Stability
Structural red flags are not confined to interior rooms; the ground surrounding your home plays a direct role in maintaining structural stability. Soil movement, improper surface drainage, encroaching tree roots and poor exterior additions can push against foundation walls, causing interior walls to rack and shift out of plumb.
When preparing for renovations that alter exterior walls, bump-out additions or load-bearing perimeter framing, you must evaluate the surrounding grade. Hydrostatic pressure occurs when saturated soil presses against basement walls or grade beams without adequate drainage. Over time, this force bows concrete block walls inward, causing floor joists above to twist and detach from rim boards.
Evaluate perimeter stability and exterior structural health using these steps:
-
Grade Slope Assessment: Check the slope of the soil around your foundation perimeter. Ground should slope away from foundation walls at a minimum rate of six inches over the first six feet to prevent water accumulation.
-
Retaining Wall Inspections: Examine nearby retaining walls for leaning, cracking or bulging. A failing retaining wall allows soil to shift toward or away from home footings, compromising structural stability.
-
Perimeter Timber Decay: Inspect mudsills and rim joists along the foundation edge for wood rot or subterranean termite damage. Probe framing timbers with a screwdriver to test for structural soundness.
-
Setbacks and Easements: Verify property lines, setback regulations and utility easements before planning exterior wall alterations, window enlargements or bump-outs.
Addressing exterior moisture and soil stability before starting interior structural work prevents future settling that could crack fresh drywall and new finishes. If exterior privacy boundaries or yard retaining structures need replacement to allow access for heavy demo equipment, reach out to local fence companies to temporarily relocate barriers. If rooflines need extending or modifying to accommodate new exterior wall boundaries, consult a licensed roofing company to properly tie new roof framing into existing structural trusses.
6. Pre-Demo Safety and Hazardous Materials Clearance

Structural integrity is not the only hazard hidden behind old walls; hazardous materials pose serious health risks if disturbed during aggressive demolition. Homes constructed prior to the late 1970s frequently contain asbestos, lead paint and synthetic mineral fibers that become friable when smashed, sawed or scraped. Inhaling these microscopic toxins can lead to severe long-term respiratory illnesses.
Asbestos was widely used in building materials for its fire-retardant and insulating properties. Common asbestos-containing materials include acoustic pop-corn ceiling textures, vinyl floor tiles, backing felts, pipe wrap insulation and duct seam tape. Lead paint was standard on interior trim, doors and wall plaster prior to its residential ban in 1978. Sanding or smashing lead-painted surfaces releases toxic lead dust that settles across living areas.
Take these essential steps to clear hazardous materials before demo day:
-
Asbestos Testing: Hire an accredited asbestos inspector to collect samples of suspicious textured ceilings, old vinyl tile, duct insulation and plaster before disturbing them. Never sand, scrape or tear down suspect materials without certified laboratory testing.
-
Lead Paint Swab Testing: Use EPA-recognized lead test kits to sample paint layers on doors, window casings and baseboards in older homes. If lead is present, adopt containment measures, including plastic sheeting, HEPA air scrubbers and negative pressure fans.
-
Respiratory Protection: Equip everyone on site with properly fitted N95 or P100 half-mask respirators, safety goggles, heavy work gloves and steel-toed boots. Disposable Tyvek suits keep hazardous dust off personal clothing.
-
Temporary Structural Shoring: Before removing any wall where structural support is uncertain, construct temporary shoring walls. Build shoring walls using double top plates, single bottom plates and tight-fitting 2×4 studs spaced sixteen inches on center, placed on both sides of the target wall.
Proper containment and hazard clearance prevent cross-contaminating clean living areas with toxic dust. Taking a cautious, methodical approach to hazardous materials ensures your renovation project remains safe for your family and trade workers throughout the construction process.
By taking the time to thoroughly inspect your home’s foundation, floor framing, plumbing runs, electrical infrastructure and exterior grade, you turn demo day from a high-risk gamble into a controlled, professional procedure. Spotting structural red flags before demolition begins gives you the time and foresight needed to reinforce framing, update out-of-date utilities and assemble the right team of licensed specialists. Investing effort into pre-demolition preparation ensures your remodeling project stays on schedule, remains within budget and results in a safe, beautiful home transformation that stands strong for decades to come.